Today I can show you a full online flight from Frankfurt to Vienna on the VATSIM network.
Enjoy 🙂
Building a 737-800 Homecockpit [OE-LNJ]
using ProSim737
![Building a 737-800 Homecockpit [OE-LNJ]](https://737cockpit.info/wp-content/files/2018/06/cropped-IMG_20180602_215624-4.jpg)
Today I can show you a full online flight from Frankfurt to Vienna on the VATSIM network.
Enjoy 🙂
I have another Status Update for you ready.
During the migration to P3Dv4, I noticed that I can overclock my i5-4690k CPU to get a little more performance out.
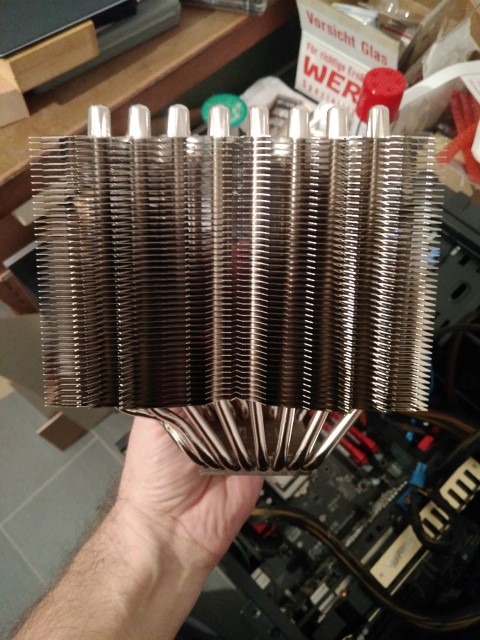
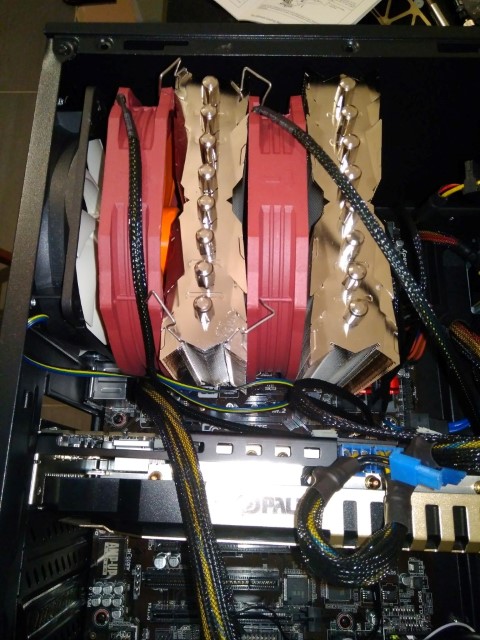
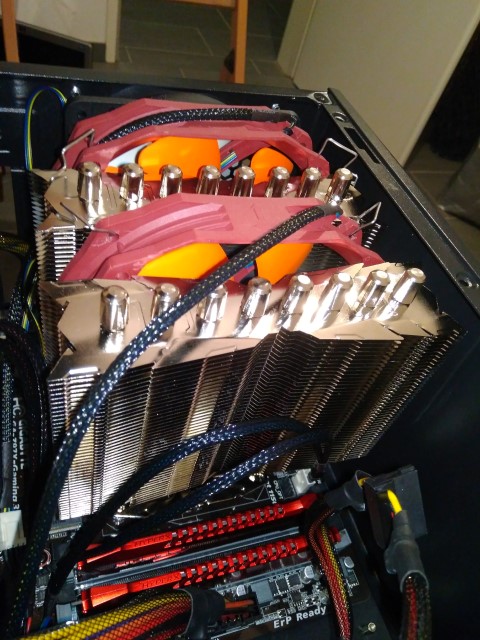
Therefore I had to change the CPU cooler to take the stonger temperature of the CPU off.
I decided to use a Thermalright Silver Arrow IB-Extreme cooler. Its a monster 🙂 But in Windows idle I get now around 27°C, before it was in the mid 30°C.
With overclocked to 4GHz I get around 50-55°C with Prime95 and 100° Processor performance.
It is now some time ago when I got my hands on a hand mic for the Captains side.
Now 2 and a half years later I found another one. I had to modify the connections in the Microphone and connect it again to a relay.
I will use a separate MIC connection on a different soundcard and mix it again with the virtual channels that feeds vpilot.

Now I can present you the time-lapse video from our Cross the pond event flight from Toronto to Copenhagen.
On Saturday 14th October the Cross the pond event was held again. This time, as usual in the autumn Eastbound.
I was participating with a flight from Toronto to Copenhagen as OS364.
The block time was 8 hours an 30 minutes. We lost about 45 minutes on ground due to heavy traffic.
Here you can some pictures from our flight.
A timelapse vide will come later this week.
Nearly one year later we finished the roof cover. This is a white fabric with velcro attached to be easily removable when access is required to the electric parts.
Also the registration was added in black “NJ” for “OE-LNJ” on the front of the roof.
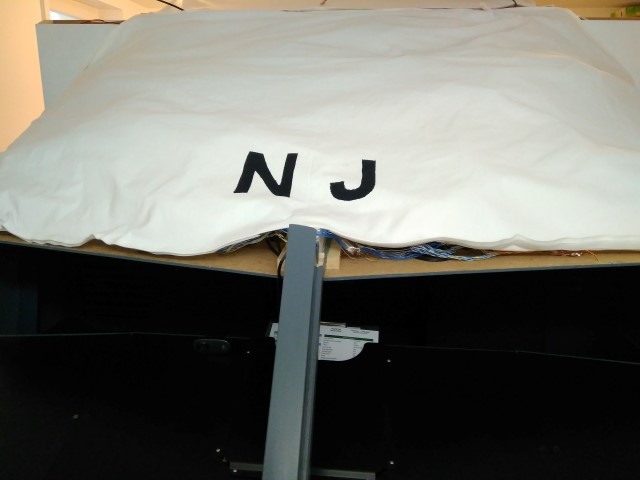
Thanks to my wife who did all the sewing 🙂
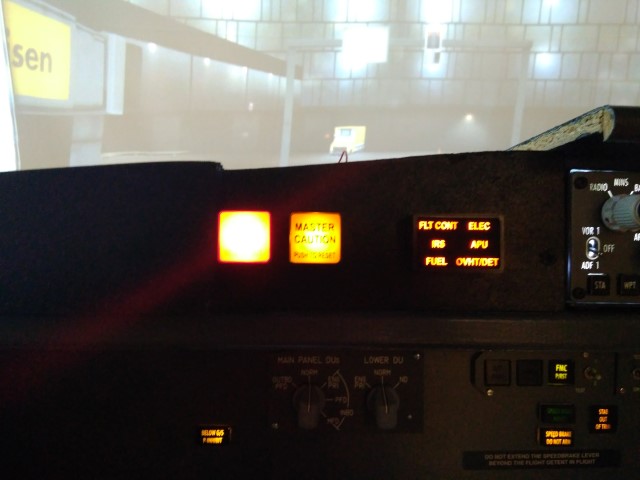
I got my hands on a 2nd hand Master Caution and Fire Warning button as well as a six pack for the captains side from Opencockpits.
For those to get installed the whole captains side panel had to be replaced. It was replaced as reworked with some additional details and painted in black instead of grey.
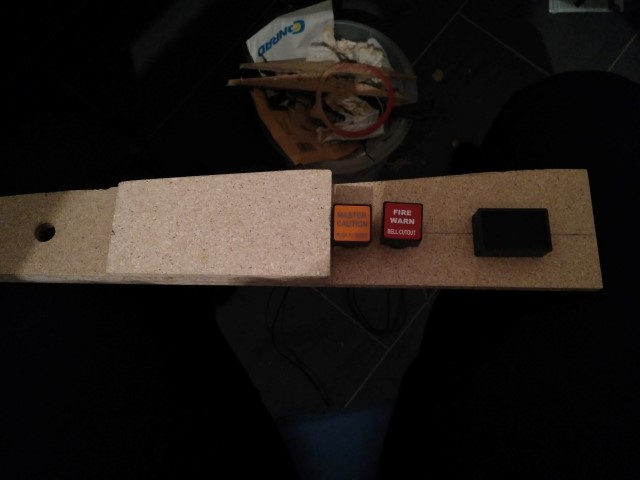
Then it was painted in black.
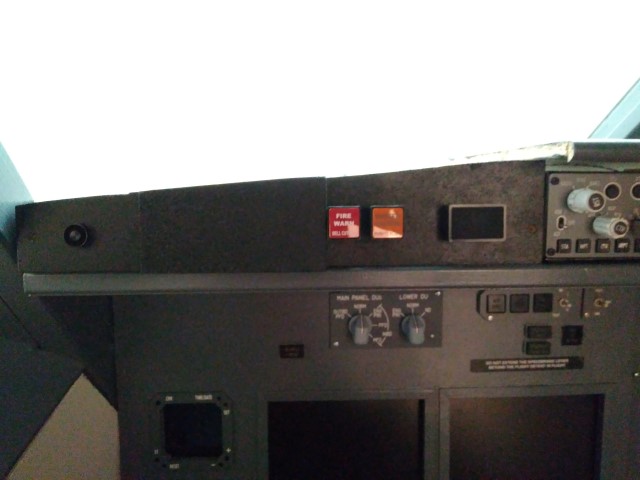
Now it was time to make the connections, but sadly the LEDs from the sixpack wont show up… I checked and double checked it. No mistake. As the modules are from Opencockpits the V+ is 5V. Pokeys is only delivering 3.3V. 🙁 So I tested it with 5V directly and it was working. Now I needed a plan for a Pokeys connection.
My plan was to buy an eight relay module which are working with Pokeys – I already have one relay in place with my strobe card.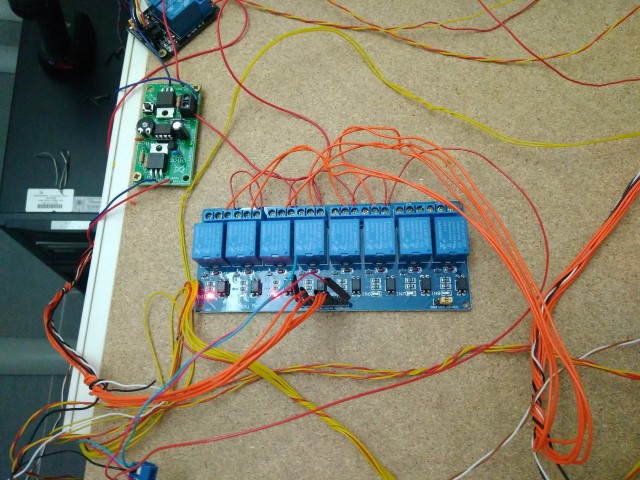
After connecting and powering on, the result looks very good and I am happy with it.
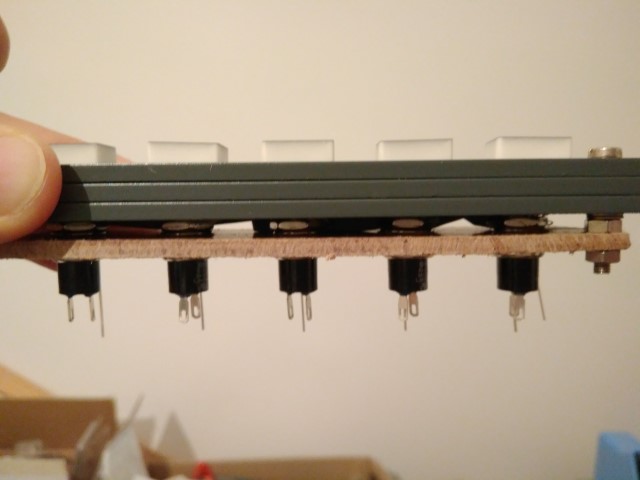
Also from hispapanels I got the dummy SELCAL panel. But I decided to make it as a functional panel.
So I made some modifications. The green LEDs came with the panel and where glued into it. To have some round push-buttons installed a whole must be drilled into the panels.
I took some 6mm buttons to be placed under the push buttons. The buttons are fitted on a small helper wooden part.
In a future release of Prosim the SELCAL panel will be enabled by the Prosim Team. It can be linked to VATSIM via the PSU (ProsimUtils) and vpilot. I will make a separate entry in the blog when it is available.
The buttons and LEDs are planned to be connected to another Pokeys Ethernet card.
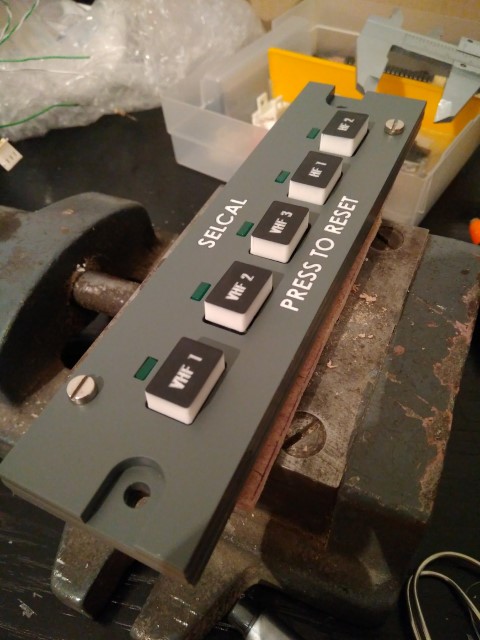
The only drawback is, that the buttons are now a little higher than original, as the push-button is placed below.
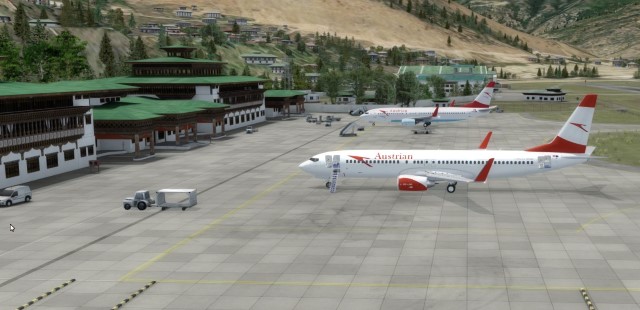
During our last flight from Mumbai to Paro this nice timelapse (20x) video was created.
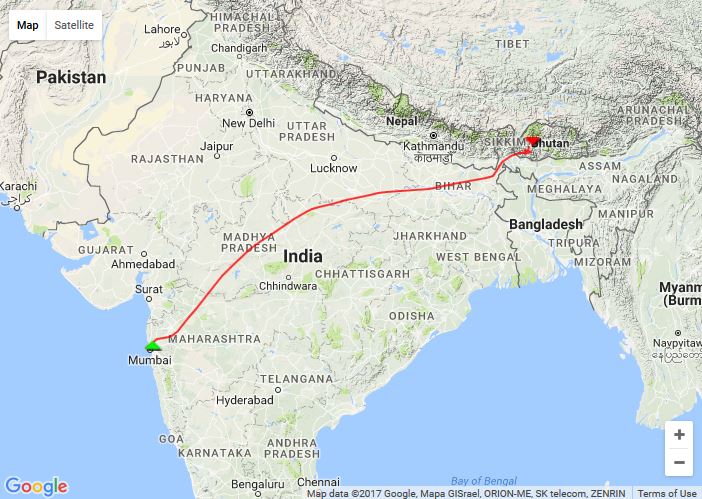
Both are landed successful in Paro.
Here you can see a slower timelapse video from only the appraoch: